How to Build a Retaining Wall: A Complete Step-by-Step Guide
Building a retaining wall is one of the most rewarding (and functional) landscaping projects a homeowner can take on. Whether you're dealing with a sloping yard, trying to prevent erosion, or wanting to create terraced garden beds or defined outdoor areas, a well-built retaining wall can make all the difference.
At Sudlow Concrete, we believe in combining practical guidance with materials and construction techniques that stand up to time, weather, and shifting soil. In this guide, we'll walk you through how to build a retaining wall — from planning and foundation to drainage, block placement, and finishing touches.
We'll also share insights on different wall types including segmental block walls, masonry CMU walls with mortar, and poured concrete retaining walls, since each requires a different level of expertise and structural support.

Why a Retaining Wall Matters
A retaining wall's primary job is to resist the natural tendency of soil to move downhill — especially on sloped terrain. Without such a structure, rainwater, soil pressure, and gravity can cause erosion, sliding soil, or damage to landscaping and hardscaping.
But a retaining wall does more than just hold back earth. Done right, it can:
Create usable flat areas in a sloped yard (e.g. terraces, garden beds, patios).
Help prevent soil erosion and protect other structures.
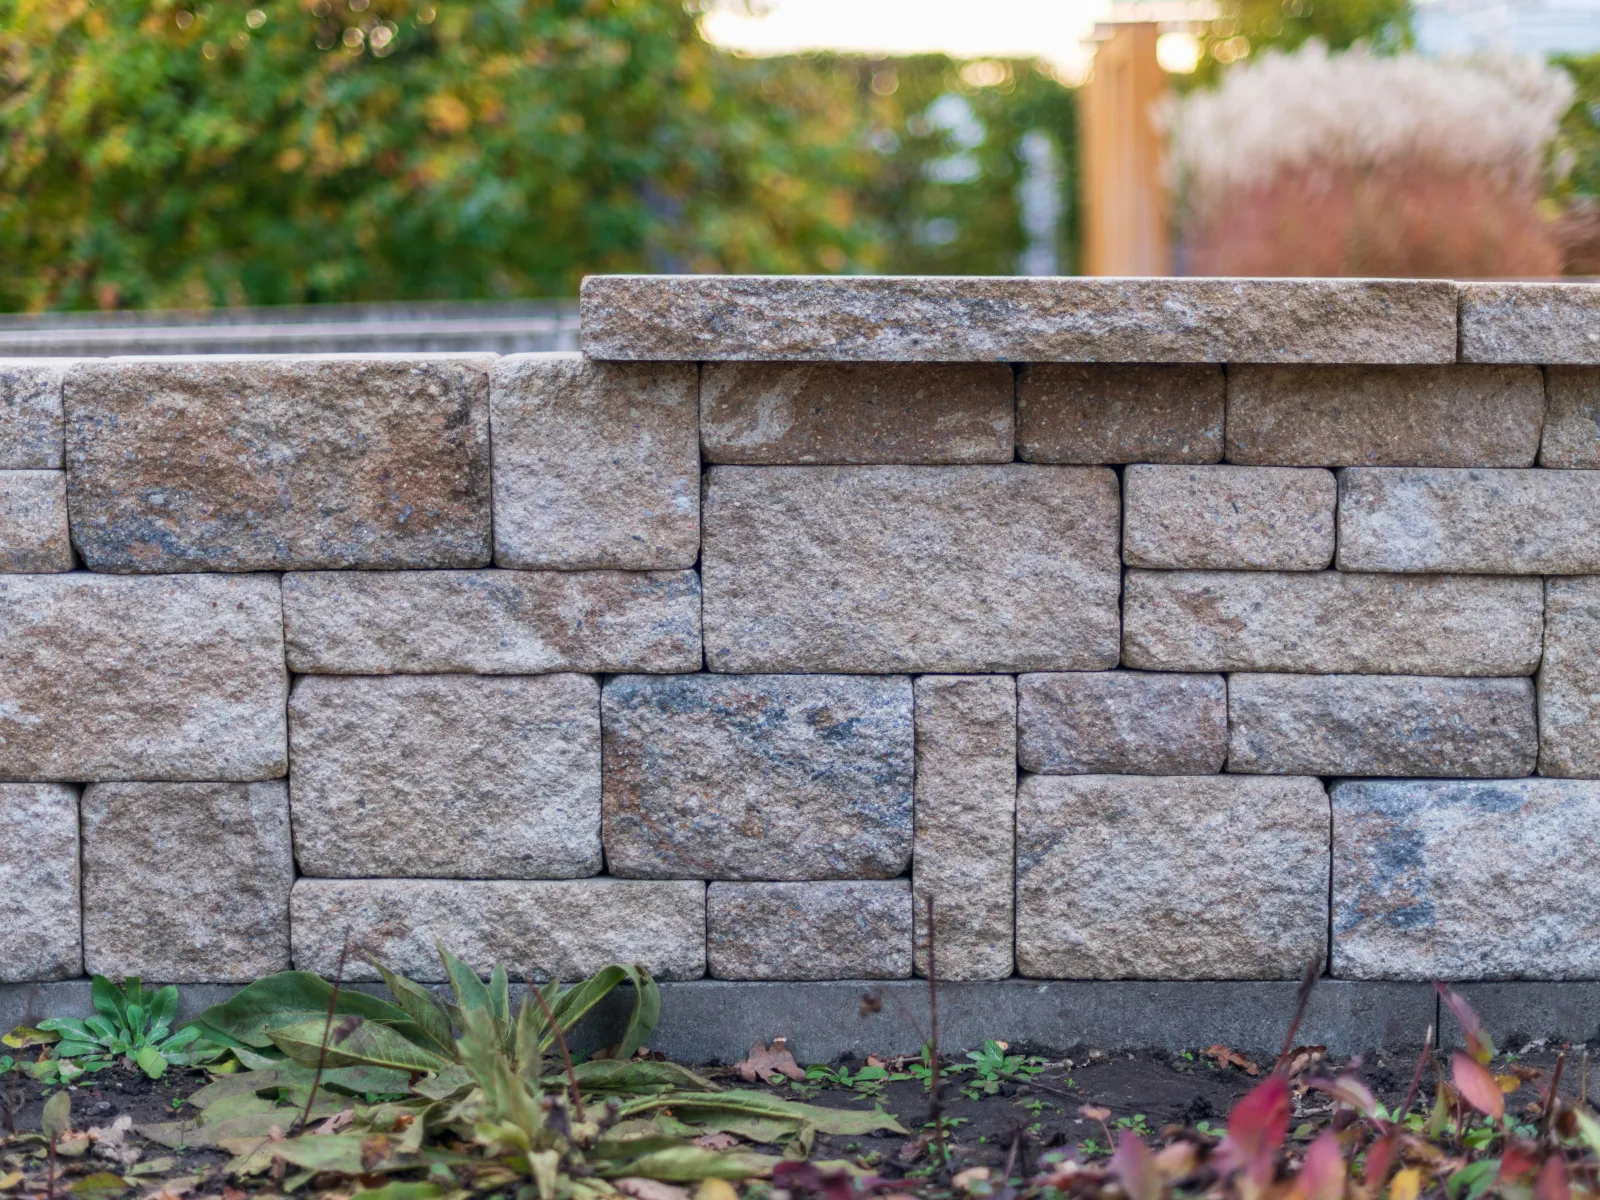
Add aesthetic appeal to your landscape, especially if built from quality materials like concrete blocks or natural stone.
However (and this is key) building a retaining wall isn't simply stacking blocks or stones: it requires planning, proper drainage, careful base preparation, and attention to structural stability. Neglect any one of those aspects, and the wall could fail.

Before You Start: What to Consider
Before you break ground, take time to plan carefully. Here are some of the most important pre-construction considerations:
Check local codes and permits. Depending on your location and the planned height of the wall, you may need a permit. Some municipalities — and homeowners associations — require approval for retaining walls above a certain height.
Call before you dig. Locate any underground utilities to avoid costly or dangerous mistakes.
Understand your soil and drainage. Soil type (clay, sand, loam), slope, and water drainage will affect how you build the wall, how you backfill, and whether you need drainage pipes or additional reinforcement.
Choose the right material. Options include concrete blocks (interlocking or segmental), natural stone, wood timbers, or other masonry materials. For most DIY-friendly yet long-lasting walls, concrete blocks are a great balance of ease, durability, and appearance.
Materials typically considered:
Concrete segmental blocks (most DIY-friendly)
Masonry CMU blocks with mortar (structural, requires a mason)
Poured concrete retaining walls (high strength, fully engineered)
Natural stone
Wood timbers
Important Note: CMU/masonry walls and poured concrete walls are not DIY-friendly — they require proper forming, reinforcement, and professional installation. Segmental block walls are the most approachable for DIY use.
Plan for drainage. Every retaining wall (regardless of material) needs an escape route for water. Gravel backfill + perforated drain pipe is standard for preventing hydrostatic pressure, cracking, or shifting.
Materials & Tools You’ll Need
For a typical segmental block retaining wall (the most common DIY type), you'll need:
Retaining wall blocks (interlocking or segmental)
Gravel (for a stable base and drainage)
Drainage pipe (perforated, for water to escape)
Landscape fabric (optional, to prevent soil migration if layering soils)
Concrete adhesive (if using capstones or top blocks)
Basic tools: shovel/trenching shovel, tape measure, stakes and mason's string/line level, rubber mallet or dead-blow hammer, carpenter's level (long and torpedo), plate or hand compactor (for base), rake, hammer/chisel (if blocks need cutting), gloves, safety glasses, work boots.
If you're building with wood timbers rather than blocks, you may also need rebar stakes, landscape spikes, and possibly tiebacks or "deadmen" anchors if the wall is tall.

Tips & Common Mistakes to Avoid
Don't skip drainage. Water buildup behind a wall is one of the most common causes of failure. Always include a drain pipe + good gravel backfill.
Never use excavated soil for backfill directly behind the wall. Use free-draining gravel or "wall rock." Avoid heavy clay or dense soils that retain water.
Ensure the base is level and compacted. A wobbly or uneven base means trouble. Take your time on this step — it's the foundation of the entire wall.
Stagger block seams. Like laying bricks — avoid vertical joints stacking directly on one another. This adds structural strength.
Account for slope. If your yard slopes, consider staggering the wall (stepping it) or building a "batter" — a slight lean back — for stability.
Maintenance & Long-Term Care
Once your retaining wall is built, a little upkeep goes a long way:
Periodically inspect for shifting, bulging, or leaning — these can indicate drainage issues or settling.
Ensure the drainage outlets remain clear and water is not pooling behind the wall. Clogged drains are a major cause of wall failure.
For walls with capstones or adhesive-installed tops: check the joints annually, and re-adhere if any movement occurs.
Avoid planting large, root-heavy trees directly above or too close to the wall — root growth can exert pressure and destabilize the structure over time.
If you live in a freezing climate: drainage and proper backfill are especially critical to reduce freeze-thaw movement behind the wall.
Building a retaining wall is more than just stacking blocks or stones — it's about understanding soil, drainage, pressure, and technique. A properly built wall protects your landscape, prevents erosion, and adds structure and beauty to your yard.
If you're ready to take on the project, follow the steps above carefully: plan, dig a solid base, install drainage, stack level courses, backfill properly, and finish with capstones and landscaping. And if your project is big, complicated, or you just want peace of mind — reach out to experienced professionals (like us!) to ensure the job is done right.
At Sudlow Concrete, we're passionate about helping homeowners create durable, beautiful hardscapes that stand the test of time. If you like this guide and want help building a retaining wall that lasts — we'd love to work with you.