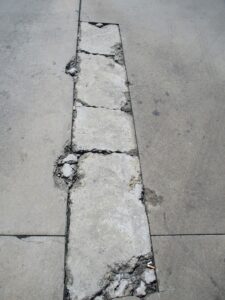
How To Fix Cracks In Concrete?
Concrete is an incredibly strong and durable material, but it is not indestructible. Over time, concrete can develop cracks due to a variety of reasons, including settling, shifting of the ground, freeze-thaw cycles, or heavy traffic.
Fixing cracks in concrete can be beneficial to try to prevent further damage, but it’s important to note that sometimes fixing cracks in concrete will only temporarily mask the problem. Depending on the age of the concrete, a full concrete replacement might be needed to fully repair. A local concrete company can always help you determine what the best approach is.
Regardless, we will discuss the step-by-step process of fixing cracks in concrete.

Step 1: Identify the Type of Crack
The first step in fixing cracks in concrete is to identify the type of crack. There are three types of cracks in concrete: hairline cracks, medium-sized cracks, and large cracks.
- Hairline cracks are the most common type of crack and are usually less than 1/8 inch wide. They are generally not a cause for concern unless they are allowing water to penetrate the surface.
- Medium-sized cracks are usually between 1/8 and 1/2 inch wide. They can be caused by structural issues or heavy loads and may require a more extensive repair.
- Large cracks are generally more than 1/2 inch wide and may be caused by significant structural issues. These types of cracks require a professional contractor to assess the damage and determine the best course of action.
Step 2: Clean the Crack
Once you have identified the type of crack, the next step is to clean the crack. Use a wire brush or scraper to remove any loose concrete debris from the crack. You can also use a pressure washer to clean the area. It is important to ensure that the crack is free of any loose debris before proceeding to the next step.
Step 3: Fill the Crack
The next step is to fill the crack. You can use a concrete patching compound to fill the crack. You can use a pre-mixed patching compound or mix your own with a mixture of cement and water. Make sure to follow the manufacturer’s instructions for mixing and application.
- For small hairline cracks, you can use a liquid concrete filler. Simply apply the filler into the crack with a caulking gun and smooth it out with a putty knife.
- For medium-sized cracks, you may need to use a concrete bonding adhesive before applying the patching compound. Apply the adhesive to the crack with a brush, and then apply the patching compound with a trowel. Make sure to fill the crack completely, and level the surface with the surrounding concrete.
- For larger cracks, you may need to use a concrete mix instead of a patching compound. Mix the concrete according to the manufacturer’s instructions, and then apply it to the crack with a trowel. Make sure to fill the crack completely, and level the surface with the surrounding concrete.
Step 4: Smooth the Surface
After filling the crack, use a trowel to smooth the surface of the patching compound. Make sure to level it with the surrounding concrete. This will ensure that the patching compound does not create a trip hazard or catch debris.
Step 5: Allow to Dry
Allow the patching compound to dry for at least 24 hours or as per manufacturer’s instructions. It is important to give the compound enough time to dry completely before sealing the crack.
Step 6: Seal the Crack
The final step in fixing cracks in concrete is to seal the crack. Use a concrete sealer to seal the crack and prevent moisture from entering. Apply the sealer according to the manufacturer’s instructions. Make sure to cover the entire repaired area with the sealer, and allow it to dry completely before using the concrete.
It’s also important to follow the manufacturer’s instructions for any products you use and to wear appropriate safety gear, such as gloves and eye protection.
Disclaimer Note: Sudlow Concrete only repairs cracks that are warrantable 3/8 of an inch or larger.


